


How to Set up Solr and ManifoldCF on an Ubuntu Based Computer
This blog post is intended to provide some guidance on how to set up a computer to run Apache Solr (http://lucene.apache.org/solr/) and Apache ManifoldCF (http://manifoldcf.apache.org/). Solr is a wrapper for Lucene. It provides a web UI and a variety of features such as document text extraction (via Apache Tika). ManifoldCF is a utility for scheduling jobs and providing repository connectors. We have used it to import documents from both Windows (CIFS) file share and MS SharePoint 2010 into Solr.
This guide was written while installing and configuring Solr and ManifoldCF on a VirtualBox virtual machine running Linux Mint 15 (Mate) x64 (http://www.linuxmint.com/). I chose Linux Mint because it is a “hot” GNU/Linux distribution these days (http://distrowatch.com/dwres.php?resource=major). These instructions can be used to install/configure Sorl and ManifoldCF on Ubuntu. You just need to be aware that the standard text editor on Mate in pluma and on gnome its gedit. So, anywhere you see ‘pluma’ below substitute ‘gedit’ for ubuntu. These instructions should also work on Debian, but I have not verified this to be the case (substitute ‘gedit’ for ‘pluma’).
The development of this guide was a joint effort of Chris Salter and myself.
Install Solr
- Download Solr 4.3.1
- Solr 4.4 has compatibility issues with the latest version of Mahout.
- http://archive.apache.org/dist/lucene/solr/4.3.1/solr-4.3.1.tgz
- Decompress and move the solr-4.3.1 directory to /usr/share/solr
- To do this via the terminal
- cd ~/Downloads
- wget http://archive.apache.org/dist/lucene/solr/4.3.1/solr-4.3.1.tgz
- tar -xzvf solr-4.3.1.tgz
- sudo cp -R solr-4.3.1 /usr/share/solr
- Test Solr
- Open a terminal
- sudo java -jar /usr/share/solr/example/start.jar
- Open another terminal
- cd exampledocs
- java -jar post.jar *.xml
- Confirm that you see something like Figure 1.
- Open a terminal
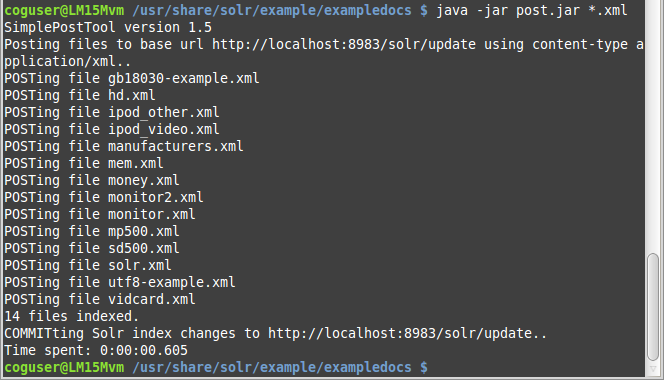
Figure 1: Solr test
- Open a browser
- http://localhost:8983/solr/
- Confirm that you see something like Figure 2.
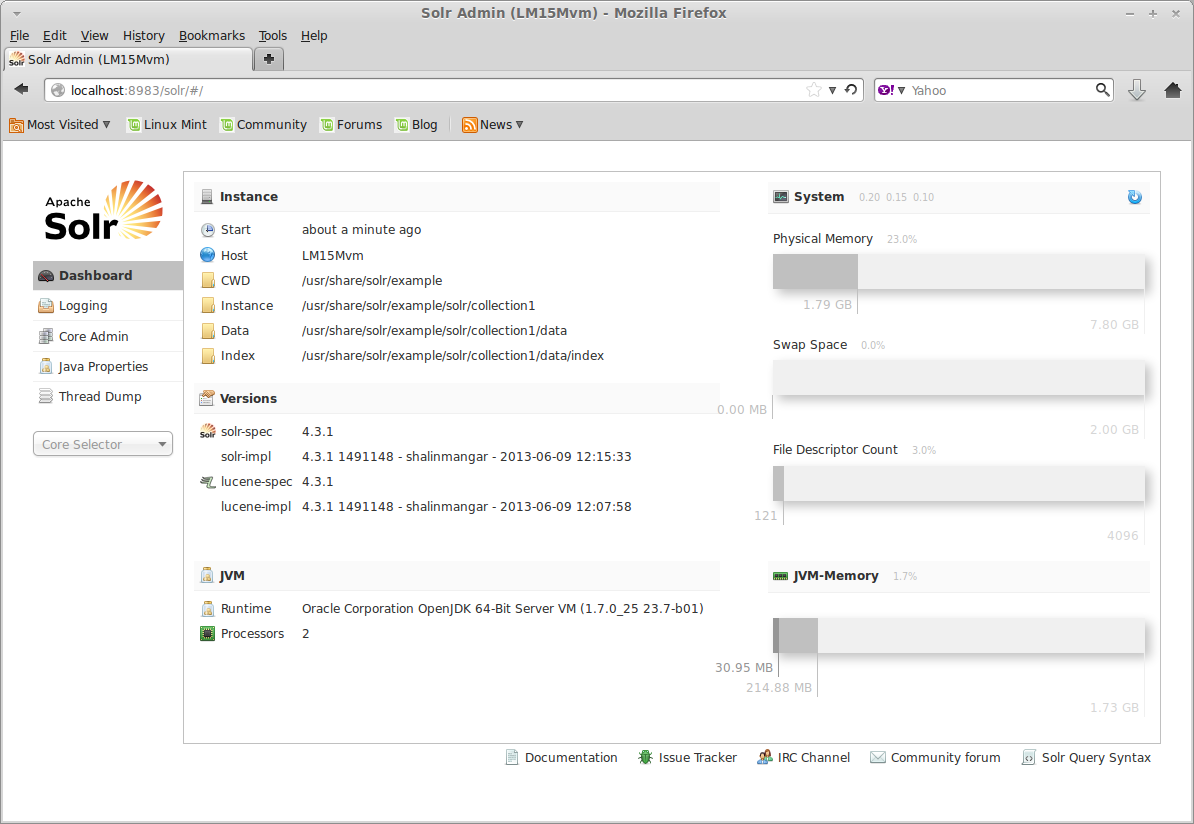
Figure 2: Solr WebUI
Install ManifoldCF
- Download ManifoldCF 1.3
- Decompress and move the apache-manifoldcf-1.3 directory to /usr/share/manifoldcf
- To do this via the terminal
- cd ~/Downloads
- wget http://apache.mirror.rafal.ca/manifoldcf/apache-manifoldcf-1.3-bin.tar.gz
- tar -xzvf apache-manifoldcf-1.3-bin.tar.gz
- sudo cp -R apache-manifoldcf-1.3 /usr/share/manifoldcf
- Test
- Open a terminal
- cd /usr/share/manifoldcf/example
- sudo java -jar start.jar
- Open a browser
- http://localhost:8345/mcf-crawler-ui
- Login
- User ID: admin
- Password: admin
- Confirm that you see something like Figure 3.
- Open a terminal
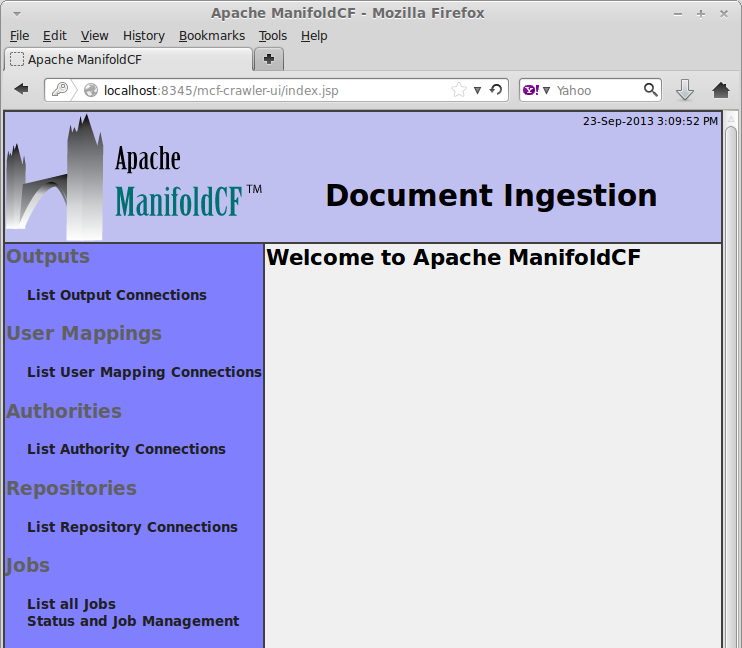
Figure 3: ManifoldCF WebUI
Configure Solr
- Recommended: Ignore Tika Errors
- Edit /usr/share/solr/example/solr/collection1/conf/solrconfig.xml
- Add the line <bool name=”ignoreTikaException”>true</bool> to the list <lst name=”defaults”> under <requestHandler name=”/update/extract” … >
- After the changes the relevant part of the file should look like figure 4. The text highlighting was added for clarity.
Configure ManifoldCF
Connect ManifoldCF to Solr
- Start Solr if it is not already running
- Open a browser
- Click “List Output Connections”
- Click “Add a new output connection”
- Name = Solr
- Description = Connect to Solr
- Click “Type” tab
- Connection type = Solr
- Click “Continue” button
- Recommended: Click “Documents” tab
- Maximum document length = 10240000 (i.e., 10MB)
- Click Save
- Confirm that Connection Status = Connection working
- (see figure 4).
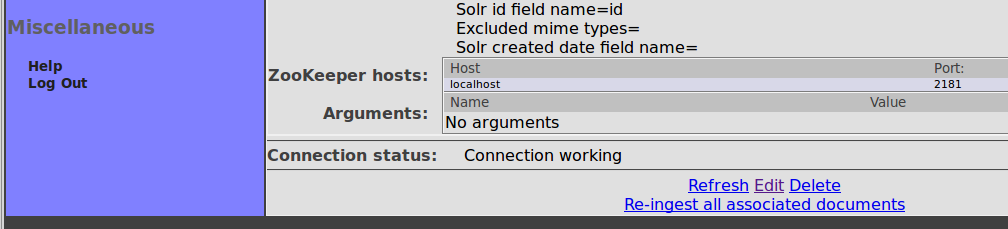
Figure 4: Solr Output Connection
Add Windows File Share Support
- Stop ManifoldCF
- Download http://jcifs.samba.org/src/jcifs-1.3.17.jar
- Move the file to jcifs-1.3.17.jar /usr/share/manifoldcf/connector-lib-proprietary
- Edit /usr/share/manifoldcf/connectors.xml
- Uncomment <repositoryconnector name=”Windows shares”/>
- See Figure 5.
- save
- Start ManifoldCF
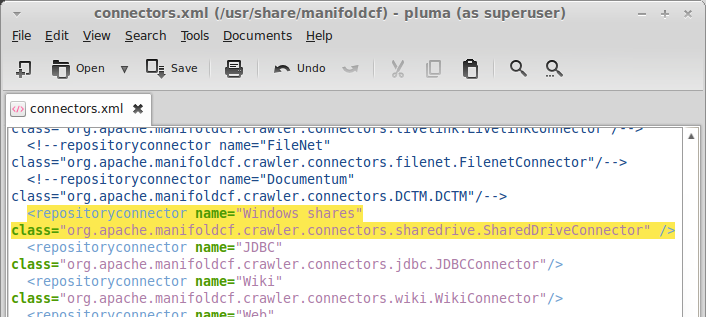
Figure 5: connectors.xml
Create new List Authority Connection to Windows File Share
- Click “List Authority Connections”
- Click “Add a new connection”
- Name = Active Directory
- Description = optional
- Click “Type” tab
- Connection type = Active Directory
- Click “Continue” button
- Click “Domain Controller” tab
- Domain controller name = your-domain-controller-name
- Domain suffix = your-domain-name
- Administrative user name = user-account-with-adequate-permissions
- Administrative password = password
- Click “Add to End” button
- Click “Save” button
Set up File Share Repository Connection
- Click “List Repository Connections”
- Click “Add new connection”
- Name = file-share-name
- Description = optional
- Click “Type” tab
- Connection type = Windows shares
- Authority = Active Directory (this is the name selected when creating the authority)
- Click “Continue” button
- Click “Server” tab
- Server = server-name
- Authentication domain (optional) = domain-name
- User name = user-account-with-adequate-permissions
- Password = account-password
- Use SIDS for security = Yes (check)
- Click “Save” button
Set up SharePoint
- Download the SharePoint plugin.
- Unzip the file locally.
- Inside the folder, you’ll find README.TXT
- Read that file, follow its instructions. (Sorry, SharePoint administration is beyond the scope of this guide)
Set up File Share Repository Connection
- Click “List Repository Connections”
- Click “Add new connection”
- Name = SharePoint
- Description = SharePoint
- Click “Type” tab
- Connection type = SharePoint
- Authority = Windows File Share Permissions
- Click “Continue” button
- Click “Server” tab
- Server SharePoint version = SharePoint Services 4.0 (2010)
- Server Protocol = https
- Server Name = your-server-name (e.g., intranet.my-domain.com)
- Server Port = your-sharepoint-port (e.g., 4443)
- Site path = path-to-site (e.g., “/sites/my-main-ste”)
- User name = account-with-read-permissions
- Password = account-password
- Click “Browse” button
- Naviagate to and select your certificate file (e.g., my-domain.com.cer)
- Click “Add” button
- Click “Save” button
Set up File Share Crawl Job
- Confirm that Connection Status = Connection working
- Click “List all Jobs”
- Click “Add a new job”
- Name = Crawl FileShare
- Click “Connection” tab
- Output connection = Solr
- Repository connection = FileShare
- Start method = Don’t…
- Click “Continue” button
- Click “Scheduling” tab
- Schedule type = Scan … once
- Recrawl interval (if continuous) = <blank>
- Reseed interval (if continuous) = <blank>
- Click “Paths” tab
- Select name-of-share (e.g., cognivashare)
- See Figure 6
- Click “Add” button
- Set Filters: See Figure 7.
- Set 1. Include directory(s) matching *
- Set 2. Include indexable file(s) matching *
- Set 3. Exclude un-indexable file(s) matching *
- Click “Security” tab
- File security = Enabled
- Share security = Disabled
- Recommended: Click “Content Length” tab
- Maximum document length = 10240000
- Click “Save” button
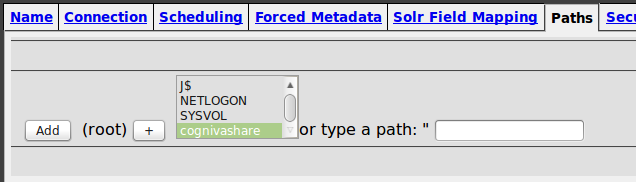
Figure 6: Select Share
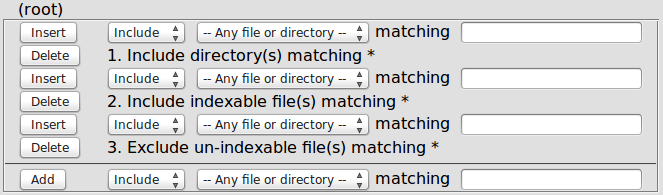
Figure 7: Path Filters
Run the File Share Crawl Job
- Click ” Status and Job Management”
- Click “Start”
- Confirm that the numbers under Documents, Active, and Processed are non-zero and increasing.
- To view the processing in more detail, click “Result Histogram”
- Connection = FileShare
- Click Continue button.
- Confirm that there is a list of file reading activities.